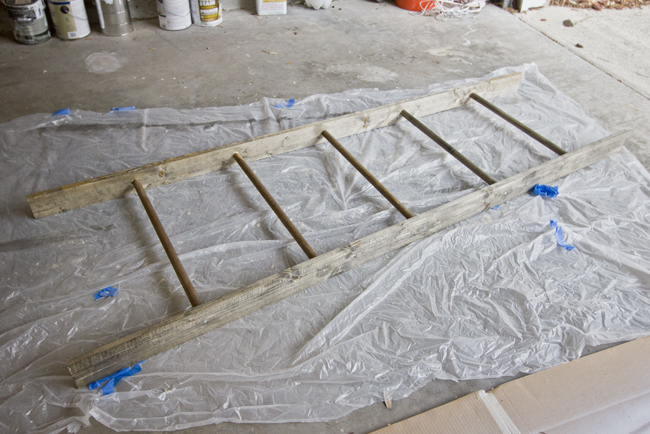
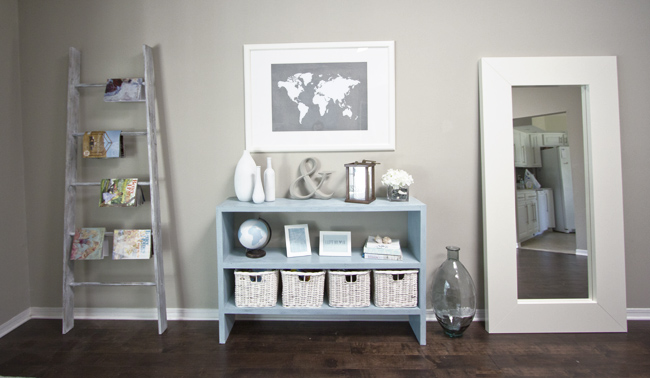
First up... the ladder:
Step 1: Buy a couple 1/4" boards. I had our drywall guy pick them up while he was getting supplies for our sunroom roof, since we are lacking a truck. The boards came 8' long and I ended up cutting them down to around 7'.
I also picked up some 1" dowels at Lowe's. Luckily, these come in smaller 3' and 4' lengths so they are easily transportable. I failed to take a raw materials picture (sorry).
My plan was for the ladder to be a little wider on the bottom, so I cut each dowel an inch bigger than the previous one. The top rung is 22" wide, and the bottom is 26" (5 rungs total).
After my cuts were made, I laid everything on the ground to get a general sense of how it would look:
Works for me!
Next was time to measure where the dowels would go.
I marked the center and drew a vertical line down the 1x4, then made a mark every 14" where the dowels would go (and repeated on the second board, of course).
I then took a small drill bit and went straight through the board on each mark I had made, in order to mark the drilling locations for the final screws that would hold the dowels in.
Once I had my holes drilled, I used a 1" wide spade bit to chisel out a hole for the dowel to fit into.
Within a few minutes, my holes were drilled and ready to go:
 |
| Be careful not to hollow it out all the way through... about 1/2" deep should be good. |
This next part required Brad's help.
While one board was laying flat, I applied some wood glue to the dowel ends and nestled them into the holes I had just drilled. When the dowels were in, we carefully lined up the top board and did the same. To secure it into place, we used a rubber mallet to make sure the dowels had seated all the way.
Success!
Finally, we used some long wood screws and drilled into each side of the dowel (using the hole locations we had made earlier).
For best results, I'd recommend setting a torque level on your drill to make sure all of the screws are tightened the same amount. This will help keep the ladder straight and avoid it from bowing out in any areas.
And we had ourselves a ladder, simple as that:
Then came the fun part... making it look pretty!
I opted for a white washed/weathered look after seeing this amazing ladder another blogger had done:
 |
| Source |
So I first stained it a nice grey-ish walnut (using my go-to stain for everything, Minwax in Ebony)
After the stain had set, I applied a quick layer of basic white paint and let it dry for a couple hours. Then I grabbed some 150 grit sandpaper and sanded random areas by hand until I was satisfied. (I seemed to have skipped taking pictures of this step, oops).
Finally, to give it a bit of extra character, I banged it up a bit with some tools lying around the garage:
I absolutely love the way the finish turned out... and it has become my new favorite thing in our house at the moment.
Tutorial #2: Painted Globe
This project was very much a 'figure it out as I go' type of process.
I've had this globe for years (World Market, $30), and it went well in our last home which had warmer colors... but not so much in this one (as you can see below)...
So I took to pinterest to gather some inspiration.
 |
| Source |
 |
| Source |
 |
| Source |
I liked these, but none of them were exactly what I had in mind. So I grabbed an Xacto knife and started tracing around a continent, just to see what would happen...
and it cut right off the globe.
 |
| Hello, Antarctica. |
I proceeded to trace around the rest of the continents (which seems like a big task, but it really went by quickly... especially because I'm a map lover anyway and had fun brushing up on my geography skills.
After not long at all, I had this:
I decided I would paint the entire globe white, then come back in where the land had been cut out and paint them in with my own custom shades of blue. It would be easy to fill them back in since they were now recessed from the areas where the paper still was.
I covered the globe with a couple coats of Satin white spray paint (whoops, no pics of this), and took the globe outside to begin painting.
I used a small paintbrush and mixed tubes of basic acrylic paint (I had two shades of blue, white and yellow to work with) until all of the continents were filled in different colors.
It looks right at home now...
What do you think? Did I convince you to try either of these projects on your own? Have you done a similar project? Let me know, I'd love to see it!


No comments:
Post a Comment