Monday 31 January 2011

Let there be Light

This weekend we finally finished installing our backyard malibu lighting, with the addition of  LED lanterns lining the lake. What was meant to be a simple installation turned into, of course, multiple yard projects.

So here's how it went. We purchased this kit (which contained 6 lanterns and two spotlights), to add to our two existing kits that we have throughout the backyard (for a total of 12 malibu lights, 6 spotlights, and 6 lanterns).

Here's the malibu lights we installed a couple months back:


The previous owner already had lanterns, but they looked about 20 years old and weren't working. Here's a side by side of old vs new (old in green):


The installation was easy, but we couldn't help but notice all the trash and muck building up in our corner of the lake:


So we got some trash bags, shovels and pool nets and did our best to scrape it all out. Which helped a little, but all the dirt kept floating back to our corner.


See those raggedy fences on the left side? We're not sure if those are ours or the neighbors, but we did not see the point in them (other than serving as trash magnets), so we decided they had to go.

The first fence was halfway hanging on anyway, so Brad was able to easily pull it out.


The second, however, was going to take a little more work. After a failed lasso attempt, Brad decided to jump in there (shoes and all) to rip the sucker out. Here's the picture play-by-play:


While he was in there, he finished trash duty and cleaned up the neighbor's share too. What a gentleman.


He brought a few souvenirs back on land... gross.


But it was all worth it for this nice unobstructed, trash free lake view...


 After all the dirty work was done, the lake junk magically dispersed and we had finally had sparkly clean water to match our sparkly new lanterns!


Then it was time for some pruning. Our giant palm tree had left us this little yard present:

This dirt patch will be fixed soon, I promise!

As Brad disposed of that, I started collecting stray sticks, which had fallen from this lovely tree:


Recognize this pic? It's my new header!

I have a borderline obsession for sticks, and I couldn't bear to see them trashed, so I decided to swap out the white sticks on the mantle for more of an au-naturale look. Since it was such a nice warm day outside, it seemed more fitting than all the stark winter white up there.


The following day, I was hearing strange noises from above while I was in the office painting. I walked outside to find this roof creature:


He was completing the long overdue task of cleaning out our gutters. We've had some heavy rains the past month and the leaves were overflowing. One less thing for us to worry about!

After laboring on the hot roof for over an hour, Brad decided he'd be the first to break-in the pool (no one's been in it since we've moved here). We decided to finally remove the net and clean it out (we had put it on last month after heavy winds and rains were blowing piles of leaves into the pool). By the time everything was spotless and ready to go, he had cooled down enough to realize that 50-some degree water wasn't such a great idea after all. But it wasn't for nothing... our backyard is finally presentable again:


Ahh yes... much better.

Last night I snapped a few pics of our lights and I'm loving the results!


While I didn't get everything done that I had planned, I'd say we had a productive weekend. I was also able to do some touch up painting and help get Brad's "Man Cave" a little closer to camera ready. More on that next post!


Friday 28 January 2011

What to expect...

Since there is so much to do with this house, and so many new ideas that are constantly popping into my head, I thought it might be helpful to organize my thoughts by creating a checklist of sorts for all the upcoming projects. Now, this list isn't set in stone, and will be evolving as I go along, but it's a pretty good idea of what I want our home to get to eventually. I'd like to complete the majority of it in 2011... because I'm impatient like that, and if something is not done it's all I can think about. As long as the finances and the husband agree, I think it can happen. We've already tackled the big stuff since moving in November (hardwood floors, scraped popcorn ceilings, lighting, paint, unpacking) now comes the "fun stuff". Oh yeah, Bring It On.

Here's what you can expect to see in this blog in the coming months:


Excuse the sloppy handwriting!

Whew, that will keep us me busy for a while. It's going to be a long road, but I think it will all pay off in the end. Thanks for coming along for the ride :)

Wednesday 26 January 2011

Entry doors, air con ducting and electrical wiring

We've been extremely busy with all the c-bus and electrical wiring so haven't had a chance to update my blog. Since my last update, we've had our front doors installed, our air condition ducting completed and most of the c-bus, data, foxtel, telephone cabling done. We are yet to start on the audio cabling. We've done a third of the lighting ... we will get there one day I think :)

This is the theatre room. Check out all the powerpoints and cabling! My head spins just looking at them!

And here is our Australian made ducting, to go with our Daikin air con. The ducts are huge and a lot bigger in real life :)


Sunday 23 January 2011

Swedish Saturday

We finally did it. We made the 2.5 hour trek to Ikea to get all the crap we've been so desperately needing. I have been planning and scheming for months over this, as I know there probably won't be another trip in the near future. Luckily we had two friends who accompanied us and helped push our 6 overflowing carts through the checkout line. Four exhausting hours after we'd arrived, we had accomplished our mission and were headed back home.

Ikea.com has a convenient feature where you can tabulate a list of what you will be buying, and it will tell you the stock availability and what aisle and bin number to find the parts at. Here was my list before I went, (not including a few things I wanted to see in person before deciding on):


But here's what really happened:


This is just receipt #1, because the delivery lady realized they forgot to charge us for half our couch and tacked on another $360. Then $210 for the home delivery charge. So including lunch, it was a nearly $3k day. But it was all necessary and boy am I relieved it's over and done with. Although next comes all the furniture assembly so I still have that to look forward to. Our boxes will arrive in two Saturdays and I can't wait.

In the meantime, we were able to bring all the small things home with us. Like my 22 Virserum frames:


Yes, these were all necessary. We have an entire house of empty walls to fill. I would have loved to grab more but Brad was becoming impatient and there was no more room in our carts. These will have to suffice for now.

It is worth mentioning that Ikea isn't exactly accurate in their color descriptions. Like trying to pass these off as "white":


Do they not have a word for "ivory" or "off-white" in Swedish? Because that's what these are. False advertisement. And while they don't look horrible, they do not match the bright white trim we have throughout the entire house. That wasn't going to fly, so I sent them off to the garage to face the same fate as many of my less than favorable colored objects: spray paint.

For some reason, the paint was just not sticking. I used almost an entire can, none of which went onto the frames. I feel like they should mention these things in their "Good to know" section on the site, like something to the effect of this would have been nice:


But anyways, it's okay, because I devised a Plan B: paint it with white semi-gloss and a sponge roller. And guess what? Worked like a charm.


Looking forward to hanging and filling these, slowly but surely...


Changing subjects, here's another Ikea disappointment: they didn't have my lamp shade in stock. The one, single lamp shade I needed to match its' twin on the other side of the bed:


So, I was forced to buy two new ones. And this was the winner:


Not bad, right? It was an extra $10 I didn't want to spend, but I like these 99% as much as the first, so I can deal.

Here it is in full view:


And here they are together:


Ignore the stark empty wall... I've got some exciting DIY projects to fill the space coming soon!

Oh and sort of off topic... I just realized I've never posted my bedding up close. I am loving this sheet set I bought at Target:


There's just something about this pattern that makes me happy... and the color is practically an exact copy of our paint swatch. It was meant to be.


Moving along...

I can proudly reveal one more "finished" area of the house: our breakfast nook. I use the term finished loosely, as we will eventually get new flooring, and we're adding shelving and countertops up to that space. But for now, it's looking pretty finished compared to the rest of our house:


Table/chair set: Walmart
Blinds: Amazon
Pendant Light: Lowes
Placemats: Ikea
Plates: Free, courtesy of our generous friends

It has come along way from this just a couple months ago...


There was even more we did today, including sprucing up Brad's media room with ledge shelving, a new rug, a couple ottomans; hanging a large picture in our living room, and Brad installed Malibu lights in the front yard... but this weekend wore me out and Sunday night HBO is calling. You'll just have to wait until next week :)


Sunday 16 January 2011

This is why I'm not a carpenter

I spent my weekends growing up in the garage with my dad while he was building furniture. Somehow, up until this weekend, I've managed to never use an electric saw or nail gun. But yesterday I decided to break them both out of their packages and complete not one, but two wood framing projects simultaneously, despite my lack of knowledge/experience. How hard could it be.... right? Well the answer is, not entirely, you just need to follow a few rules that I found out the hard way. Here's what went down, and the lessons I learned (after over 40 miles of hardware store trips).
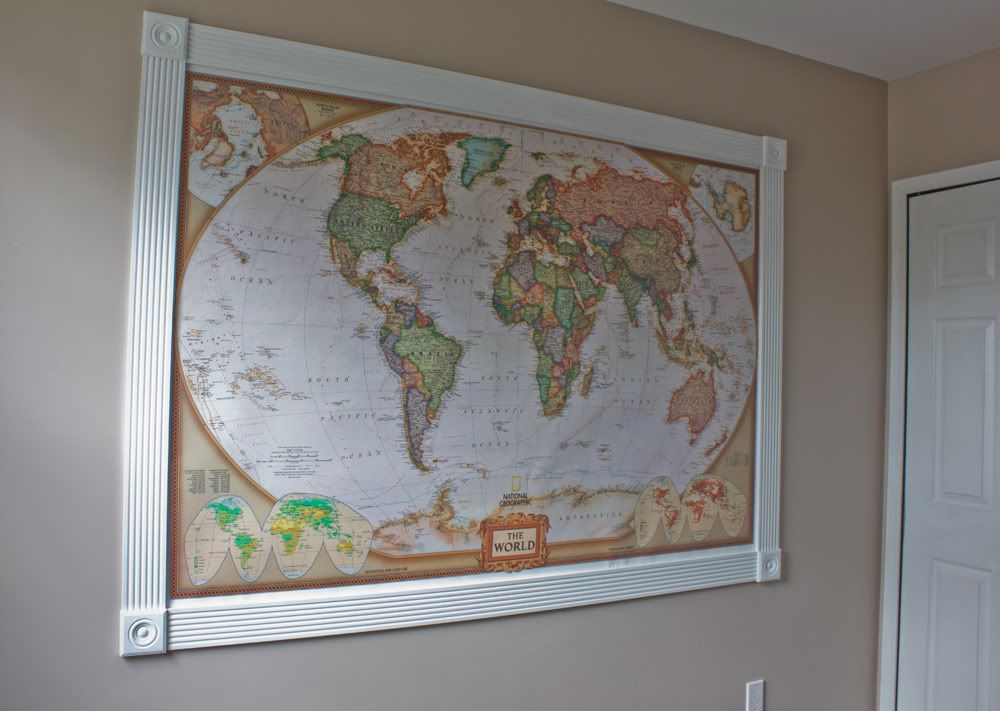
Framing a Map

I had purchased a large wall map a couple months back on Amazon that I thought would be perfect in the office. The poster paper on the wall look was a bit too unfinished for my liking, so I decided I would frame it in with crisp white trim and mitered edges.

The first step, of course, was measuring. So I took my measurements (70" long by 48" tall), and went to Home Depot to find some trim. The trim had to be flush against the wall on both edges, so crown molding was out. I settled on some lovely corrugated-type trim (sorry, I forgot the technical term) that I thought would bring a bit of interest to the piece. I made the rough cuts at Home Depot and brought it all home.

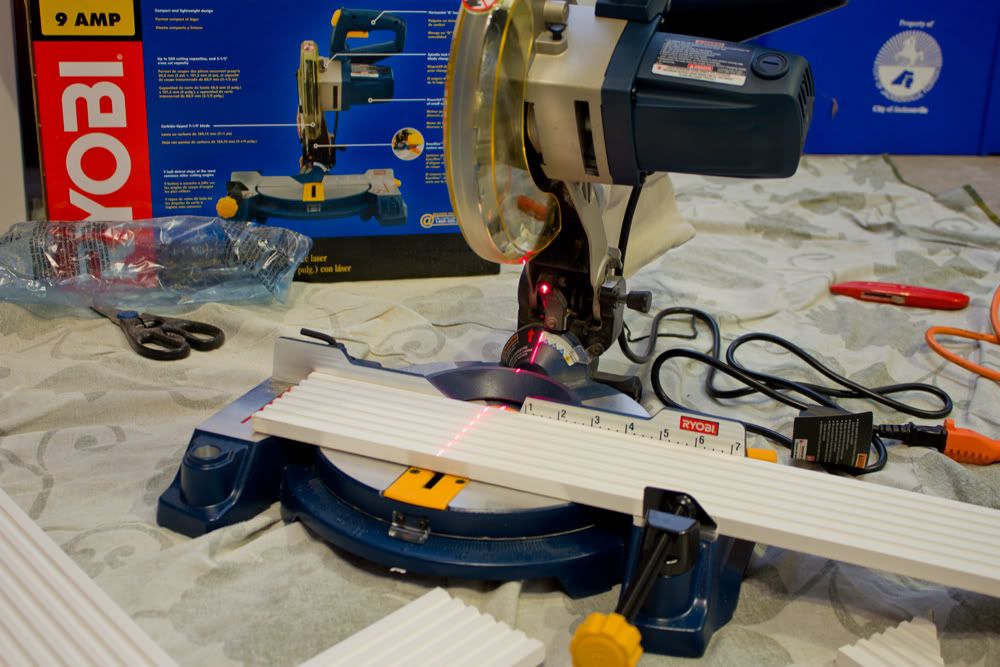
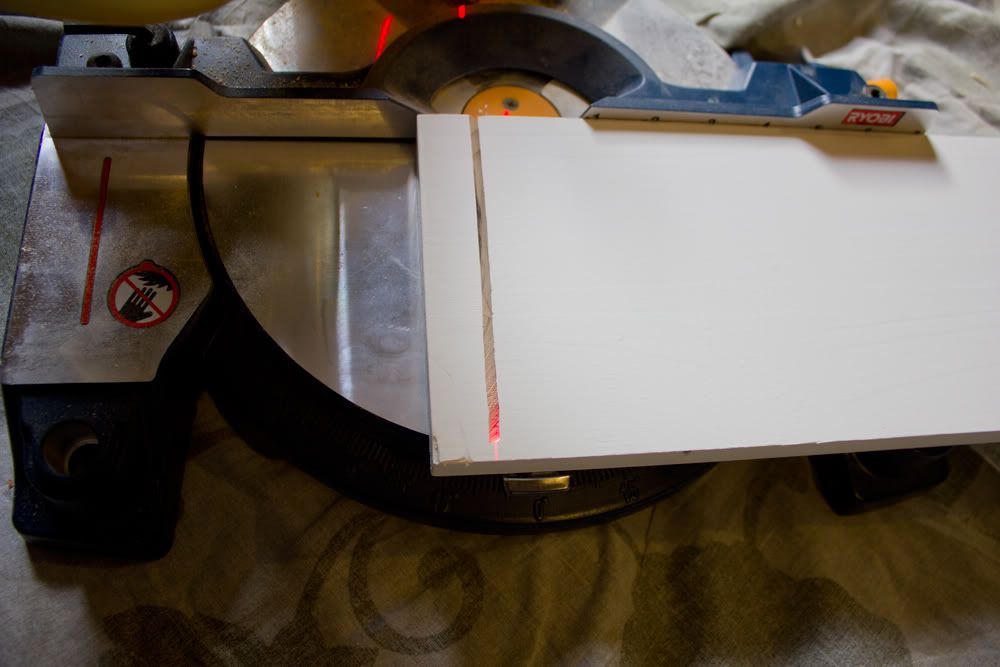
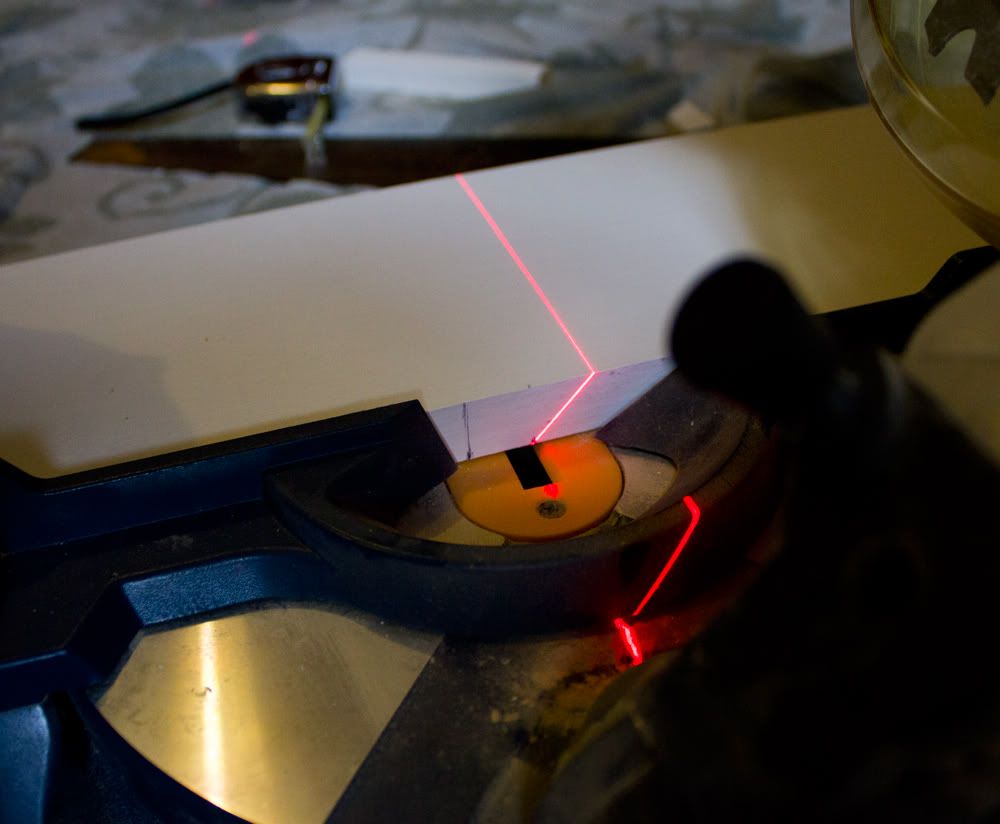
Here's our lovely saw in action:


Can I just stop for a minute and tell you how necessary this laser is? I can't believe some saws come without it, there's no possible way we could have made an accurate cut without it. Moving along...

After making my first cut, I immediately realized that I forgot to account for the extra length needed when making 45 degree cuts, which brings me to my first lesson:

1. Measure, measure again, then measure again, then stop for a minute and look at what you're about to do, and measure again.

There's one piece of board ruined. At that point I weighed my options, and decided it might be a better idea to just make straight easy cuts and use rosette blocks in each corner (which Brad had originally suggested in the store, but I declined). Of course, that required another trip to Home Depot, so off I went for trip #2. They only had two blocks left, so I had to drive down to Lowe's to find four in the correct size.

Back at home, we finished off all the cuts (after some trial and error, realizing that the saw wasn't set exactly to 0 degrees, thus making slightly crooked cuts), and we migrated to the office to try and figure out how to adhere the map to the wall. It was currently secured by eight tacks, and Brad suggested using hot glue on the edges. We had nothing else, so hot glue it was. This seemed to work okay, until we somehow ended up with air bubbles once it was all sealed. Too late now... maybe the trim will cover it?

We worked our way around the map, starting from one edge to the other, using the nail gun to secure the trim into the wall. We used hot glue on the rosettes as not to damage them with the nails (since we couldn't get them flush against the trim due to the divets). That worked fine. Somewhere along the way we realized either the trim or the map was crooked, because the border was not even along the edges. But at this point we had given up and were rushing just to get done. (Sorry, this is why there are limited pictures of the actual construction).

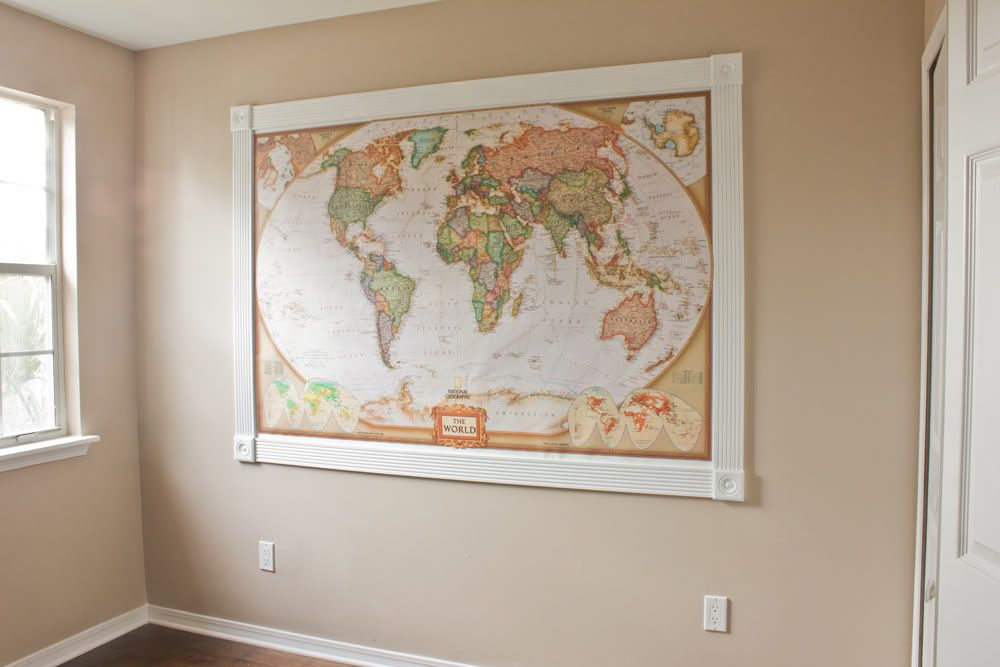
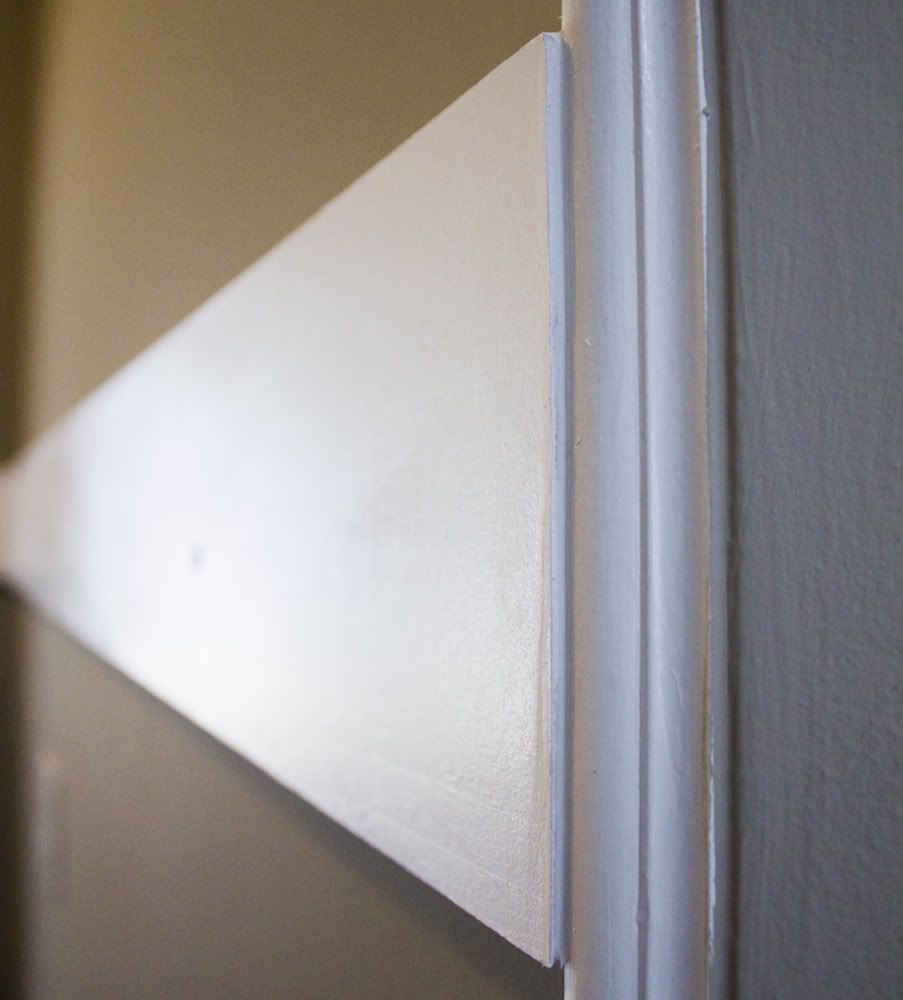
At this point, Brad went and partied while I stayed and caulked every edge and re-painted everything. For our very first miter saw/nail gun project, I'll say it was only slightly disastrous. Here's the finished result:


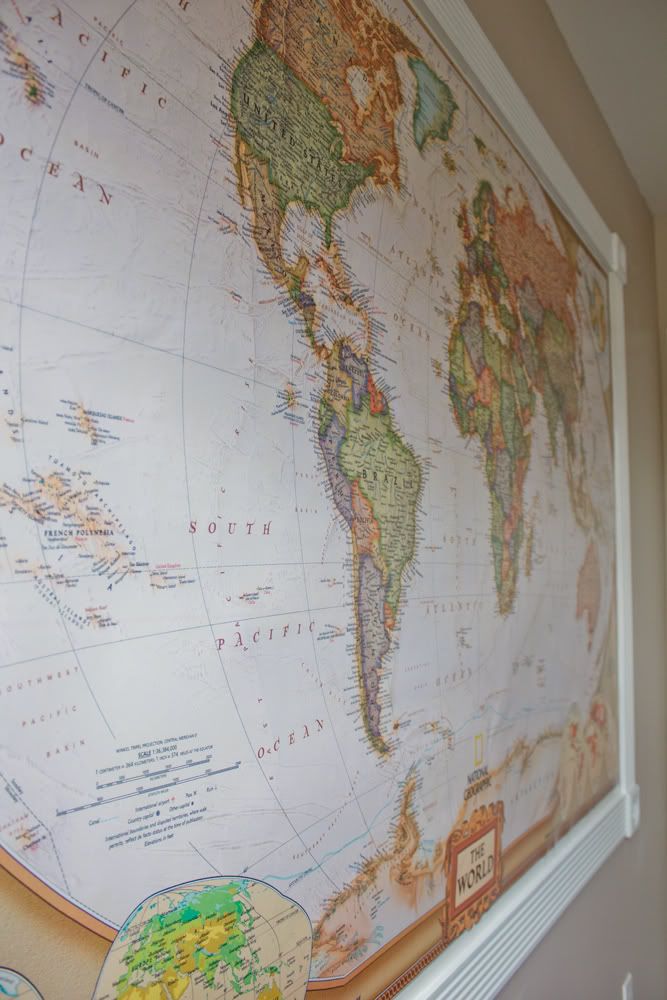
Here's the edge detail up close:


All in all, I'm glad we decided (not by choice) to go with the rosette corners. I think it adds a touch of sophistication, and definitely turned out better than my crooked miter cuts would have been.

But really (and Brad doesn't know this yet), I just bought it so I can see all of my future private island investments up close and start planning out my yacht routes, like here...


maybe a couple in here,


and for sure one of these blue dots will have my name on it...


...someday.

Anyway, onto our project #2...

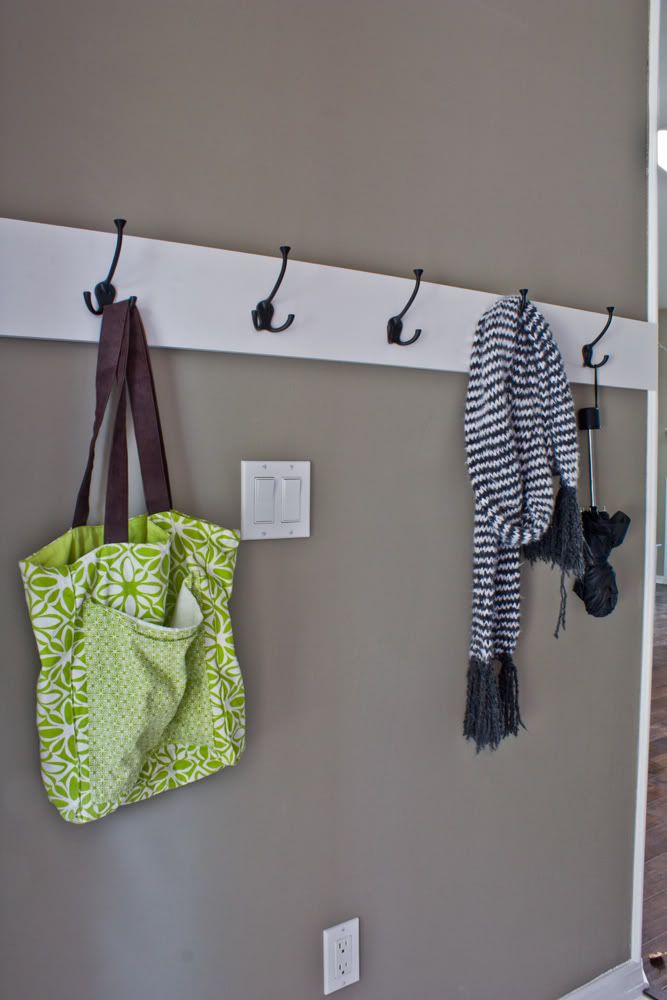
Building a Coat Rack

This one I've been scheming about since the day I moved in and saw that lonely, empty foyer wall. It was just begging for a coat rack. So today I granted its' wish... but not after some serious struggles.

I had originally pictured a standard 2x4" board for this, but of course Home Depot didn't carry such a size in a primed finish (limited time, didn't want to deal with bare wood). So I went for the closest thing, which was 1x6" primed pressboard/MDF. $9 for about an 8 ft piece, perfect.

We get home, take all the measurements, get ready to make the cut... and this is what happens:


Great... our saw is too small. Which brings me to the next lesson of the weekend:

2. Use the correct tools for the job.

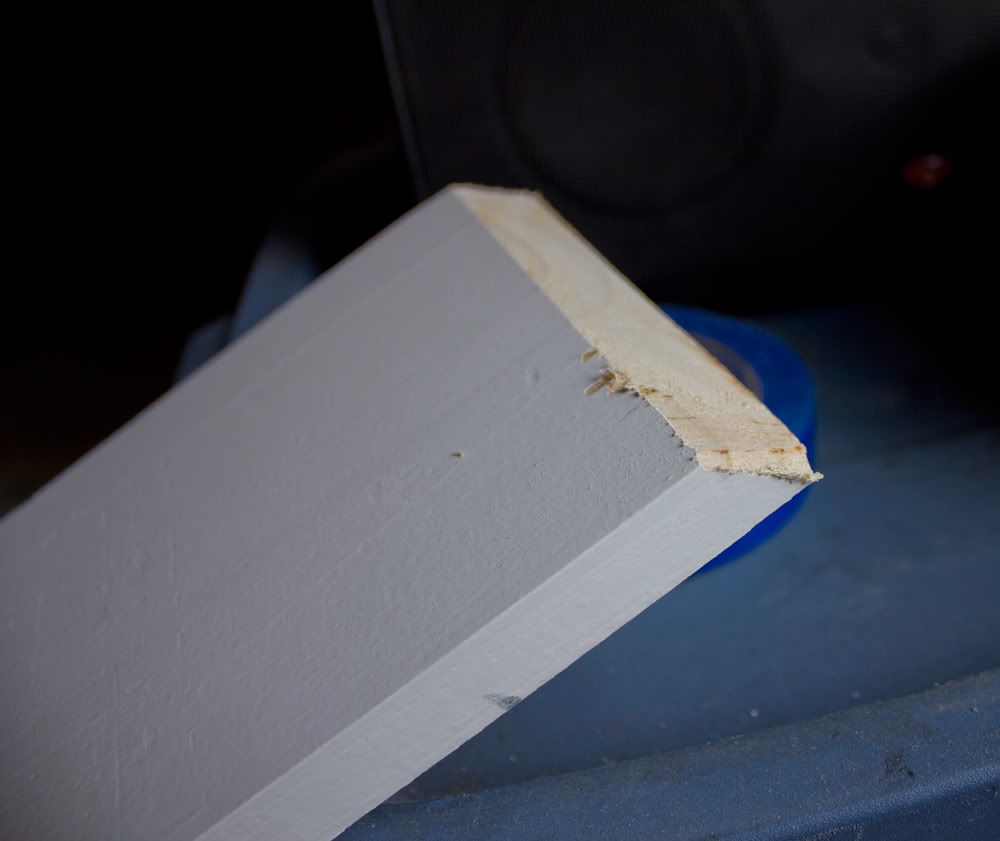
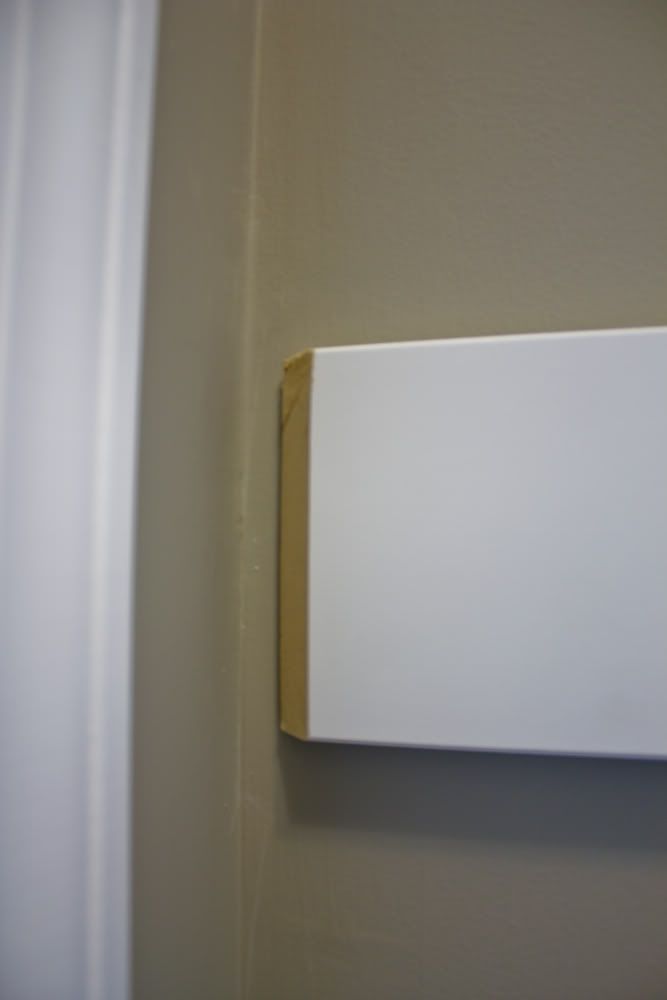
I never imagined having the need to cut wider than 4" when I purchased the saw, but you never know... and this is what I get. So brad took a hacksaw to it to try and finish it off, which resulted in this edge:


And this was the smoothest edge of the day by a long shot.

But that became trivial as soon as I realized I had cut the wrong angle. Crap... another board ruined. I tried to conjure up ways to somehow fill the gap... but this was just not about to happen:


Off to Home Depot/Lowes again. This time I went to a different (ahem, closer) HD location, but of course they didn't have that same board. So I bought a 1x8" pine (not pressboard) wood for about the same cost. Which brings me to my next hard-learned lesson:

3. MDF > Real wood... at least when it comes to ease of cutting.

Making the saw-cuts by hand on MDF was a piece of cake compared to pine. That thing splintered and broke off like no other. We spent about 30 mins with a utility knife and sandpaper trying to smooth the angle down to fit. But this time I took half the morning to walk back and forth from the foyer to the garage to make sure the angle was right so I didn't screw it up yet again. Brad (the genius he is) pointed out that the laser actually showed the line of the angle cut, which made my life 100x easier:


So we finally cut the dang thing, but we couldn't saw the straggly edge off straight. I nearly gave up at one point, about to return the saw to get a larger one just so I could make a smooth cut. But my sanding paid off, and the dang thing finally went into place.


I later fixed this edge with sanding, caulk and spackle


I filled and smoothed this edge, too


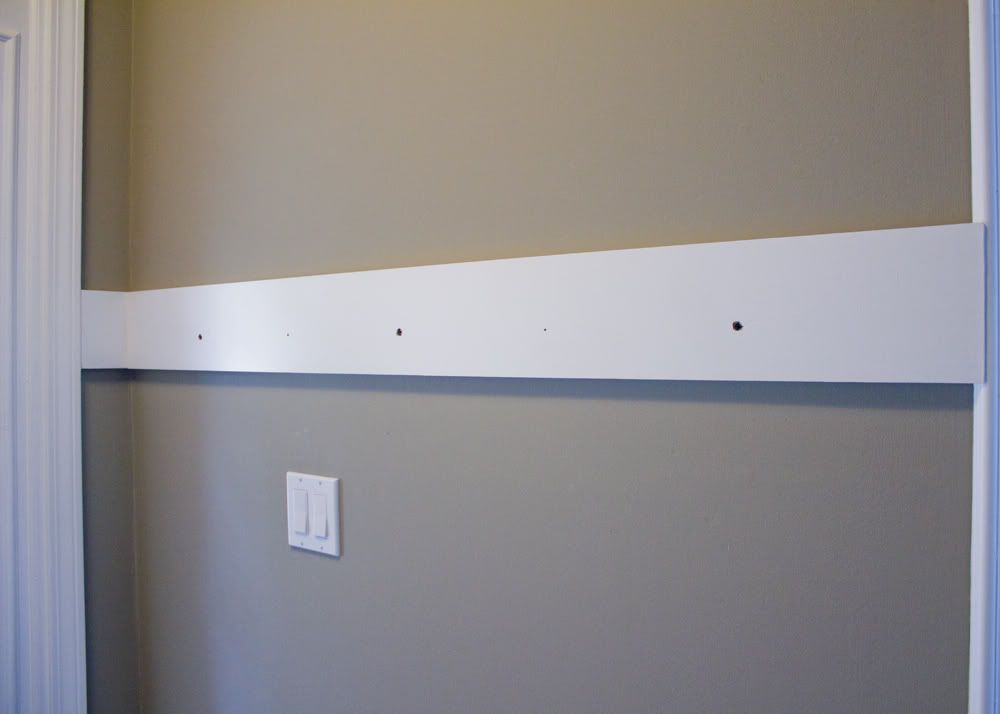
Finally, success! Now to mount the dang thing. We knew we wanted the screws to be hidden, so the obvious place would be to mount them behind the hooks. But of course we needed to be on the studs, and we had no stud finder... so we went with the drywall inserts instead. I bought five hooks, so I measured the spacing from one end to the other and made my marks. We then drilled pilot holes for each, and held the board up to the wall to go back through the holes. Luckily, the far right hole happened to land in a stud, so we decided to just use one more drywall insert in the middle, and one on the end.


We counter-sunk those three holes so we could mount the hooks flush over them (the other two holes in the middle we just left as is, as they were no longer needed).

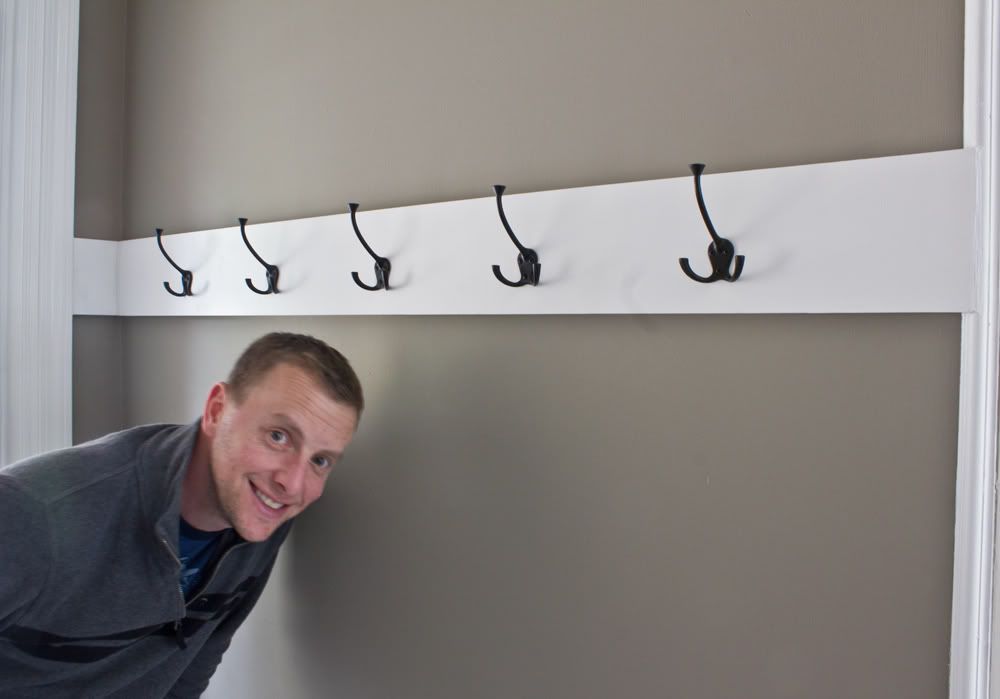
With the board finally sturdy, I used our laser-aligner and made my marks just below each hole for the hook screws. Worked like a charm, and here they are all lined up (with the proud hubby)


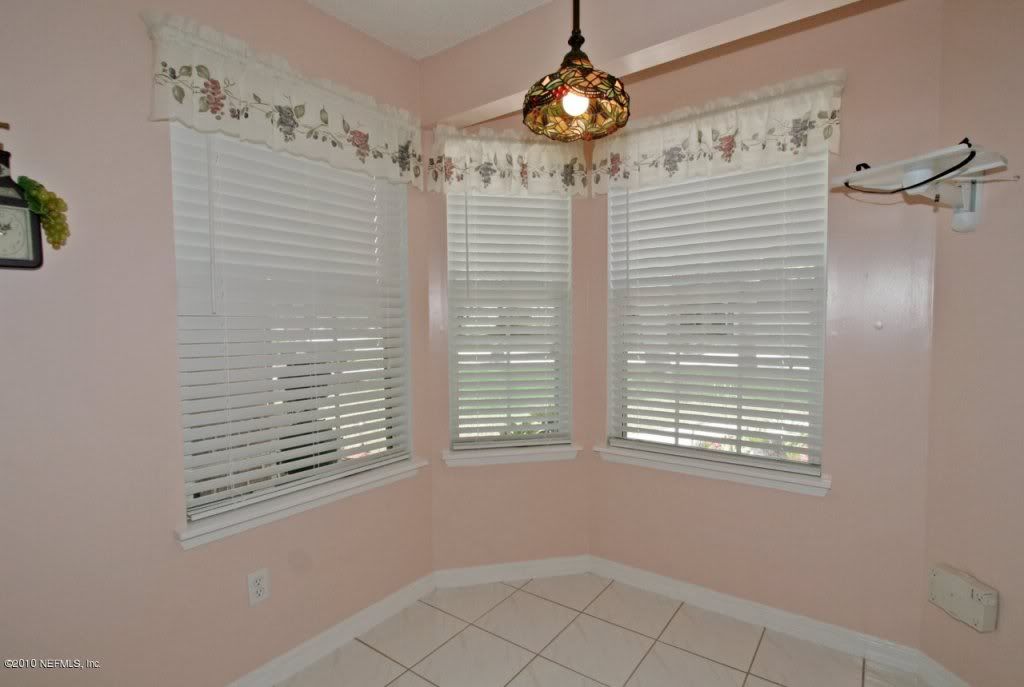
Here's a good before shot of the foyer. The coat rack was installed on the right (I posted the After shot of the left side in last week's post):
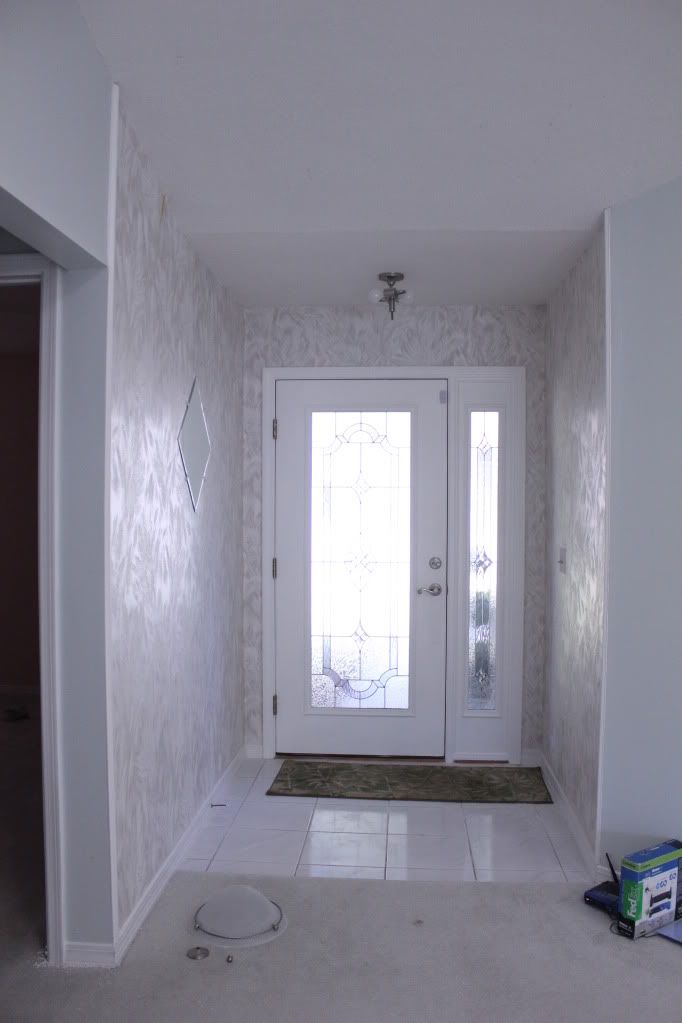
Before


Whew, so glad that's over! And proud for being able to pull it off, despite the lack of tools/knowledge.


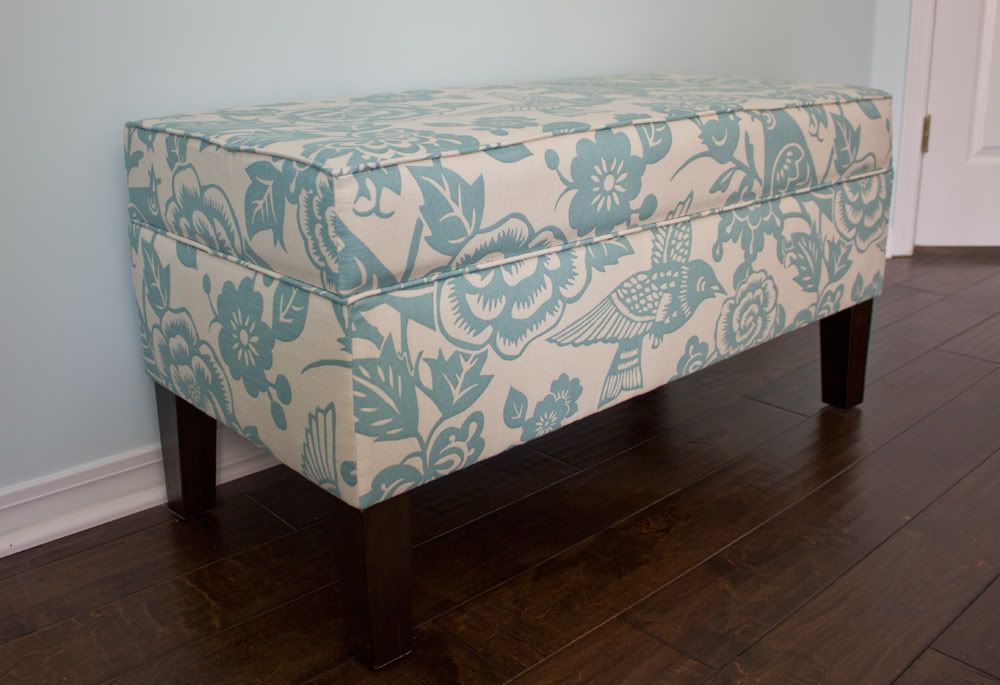
Now here's the fun stuff. My storage bench from Target arrived!


Isn't she lovely? I love that it maches our room so perfectly... turquoise & cream. Yum. And she's not just pretty to look at, she's functional too:


Not that I even have anything to put in there... I'm just in love with storage of any kind. Living in a 700sq ft house for 2 years will do that to you.

How sweet is this fabric though?


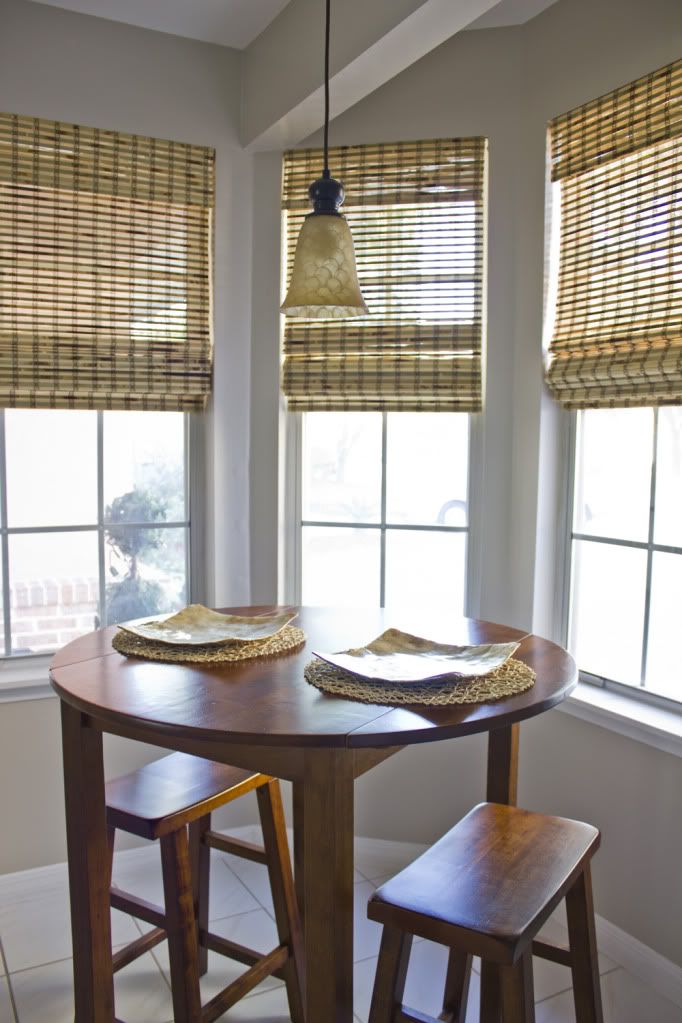
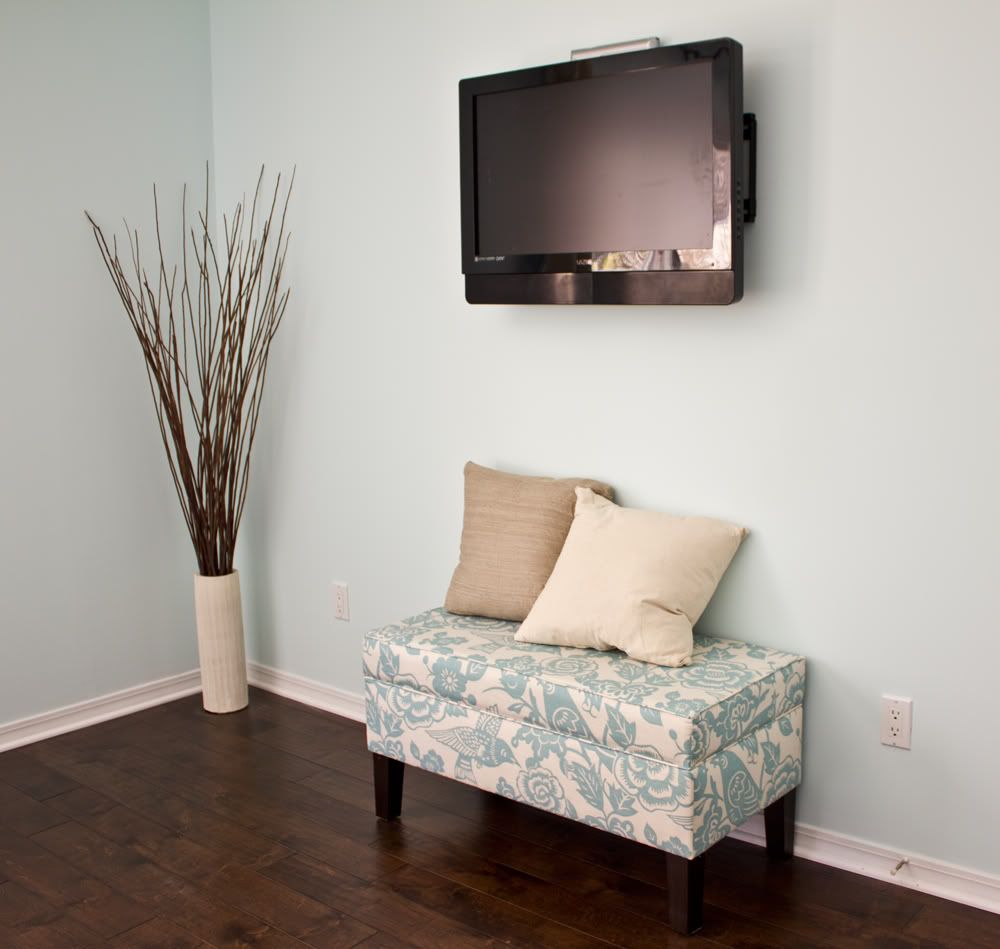
And now, I'm proud to say, we have our first complete wall of the entire house:


This is the wall opposite our bed in the master. Last week, we had just wall-mounted the TV and were trying to figure out a storage solution for the cable box. I was originally going to fabricate some small floating shelf just underneath it (yeah right, after barely being able to install a coat rack), but we realized that the box might just be small enough to hide between the wall and the TV. What a perfect plan that would have been.... if we had mounted our outlet like 4 inches over. Ugh, bummer. It was too late to move it, so we went with the second best option, sliding it as far down as we could behind the TV until it hit the wall mount. You can see it poking up there above it. Really, it doesn't look bad at all... you could mistake it for part of the TV. And from lower angles you can't even see it at all:


Hey, works for me.

In a word,  I feel accomplished this weekend. I now know what I can and can't cut, and I think I'll make a lot less mistakes from here on out. Almost ready to tackle the chair rail & molding in the dining room. Let's see what happens next week!

psst... this post has been linked to the DIY Showoff!