
This will be a 3 (or 4?) part series if everything goes according as planned. Let's start this project off with the scary before...

Doesn't this photo make your OCD kick in?


These were not even staged. It just looked like this all the time. So you can see why I was beyond ready for a more practical solution. Also, I despise wire shelves for pantries. It just makes no sense. Things stand crooked and fall through the gaping holes. The photo above illustrates my point with those two falling bottles. These suckers have to go.
I thought about this for months. I brainstormed these elaborate ideas to try and maximize the awkward deep, short space that is the opposite of what a pantry should be. I came up with L shaped shelves and wall mounted spice racks and anything else I could squeeze into this space, but in the end decided on a simpler, more fail proof blueprint.
Here's the plan I came up with:
1. Clean out/organize items
2. Locate an inexpensive glass jar set
3. Come up with an arrangement for each shelf
4. Purchase boxes/baskets for said arrangements
5. Remove door and wire shelving
6. Patch and paint inside (I hate to be predictable, but I gotta go with turquoise...)
7. Gather/cut wood supplies for shelves
8. Modge Podge fabric onto shelves (instead of heavy items directly on a painted surface)
9. Install shelves
10. Buy new spice jars, restock and organize
11. Hang a fun patterned curtain
12. Enjoy!
The most challenging part of this is going to be building the shelves. We've done this once before in my office closet, but it has been a while and there are more shelves to hang.
This time I'm planning on omitting the front lip piece and leaving it open to maximize the reaching room as much as possible. I'm also excited to try adding fabric to the top, inspired by this tutorial I found on Pinterest. I know from experience how heavy objects sitting on a painted surface for an extended period of time can stick to the shelves, so I'm hoping this will be a great alternative while adding some style.
First thing's first: start clearing crap out.
The sloppy pile of foil/bags/wrap was the first thing to go. I cleared out a mostly unused shelf on the other side of the fridge and made them at home:
 |
| I just noticed our saran wrap is the same box we brought with us from Cali over 2 years ago... clearly we are not heavy users. |
That was where we stored paper towels before, which I relocated by making a shelf adjustment in our bowl cabinet which left room for four rolls:

I was also able to stash a couple in a hidden corner between cabinets next to this shelf:

Sneaky, right? I thought so.
As for the boxes and baskets, I fell madly in love with these after spotting them at the Container Store:
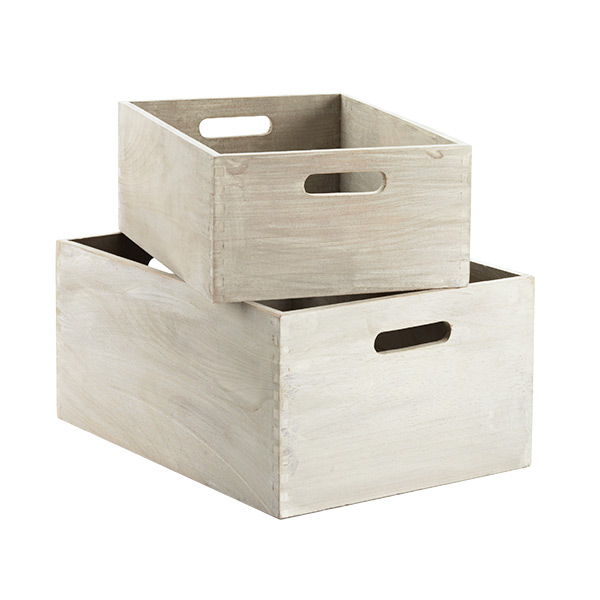 |
| Source |
They weren't my idea of cheap at $20/ea, but the look and size was exactly what I needed, and do you know how hard it is to find the perfect fitting boxes for such a tight space?
Before I pulled the trigger, I cut up a couple spare boxes that were almost the same size to make sure they would work:

And hooray, they did. So I got them. $50 shipped.

I designated one for snacks and the other for condiments, but things may shift a bit once everything is said and done.
The biggest obstacle would be finding jars to hold everything I needed, in the right size, that didn't break the bank. The last condition being the most important. After dropping $50 on a couple boxes, I wanted to make up for it with my jars.
First I took inventory of everything I had that could be stored in a jar, and made a list (in my handy dandy planner, of course)

It came to 16–20 canisters, depending on what would end up fitting best. Then I noted whether they would be best suited for a large, medium, or small jar.
With my list in mind, I started researching like crazy. There really isn't as many canisters as you'd think out there (unless I was just looking in the wrong places... but I scoured the internet). I found a couple nice ones on Amazon and the Container store, but at nearly $10 a jar, it was way out of budget.
Even Walmart was surpringly pricey...

I drove to every dollar store I could find before ending up at the happiest place on Earth:

I imagine this is what the gaves of heaven look like. Seriously.
Inside the gates I found three potential candidates:

The setup on the left wasn't my first choice because the canisters didn't match, but I threw them in there for good measure. I had a feeling the tallest canister on the right side wasn't long enough for my angel hair pasta, but I didn't have my tape measurer with me so I just snapped these iphone photos and took them home to study.
Oh, and it didn't hurt that these were their prices...

And they were half off, making them $3, $2.35 and $2.25/ea. Now that's what I'm talking about. (If you don't live near a Hobby Lobby, my condolences).
According to my measurements, I could fit 6 jars in a row and decided upon 6 large, 8 medium and 4 small. I came back the next night and bought everything that was on the shelf, which was only 4 of each size.
But I had apparently miscalculated...

It was a hair too narrow to fit 6 jars. So I just lined up the 4 of each I had for a visual...

And I decided this would actually work better, because a) there would be more wiggle room for easier access, and b) I could build a small shelf on the right side of the shelf wall to store my spices. Perfect-o.
It just meant I had to eliminate some jar contents and store them in their original packaging instead—no biggie.
Then it was time for an exciting night of food organizing, which looked like this:


After everything was in its place, I ended up with two small jars I wasn't using. This ended up being okay because now I had the perfect spot for oil & vinegar jars, which are frequently reached for in this house.
Next it was time for the most exciting part: labels!
To keep this part free, I simply used the same 2" round labels and template that I use for my print packaging.

The dotted outline and color were already what I had in mind so I just swapped out the text and printed a sheet.
At first I thought the round lids would be an ideal location, since I could pretty much tell what I was looking at without having to read it...

But then I decided I wanted to be able to see them so I relocated them to the front.

I know the middle row names aren't fully visible, but I know what I'm reaching for so it's all good.
The next day at Hobby Lobby while returning the two small jars and searching for more boxes/baskets, I came across something I had seen before and always swooned over. I finally had a good use for it!

Don't you love it?
I love this organization feature, too...

It's the perfect spot for small boxes, packets, spices, etc. I'm sure things will get shuffled around some before the end of this, but it makes me happy.
And that, friends, is the recap of Phase 1. This is how the pantry currently looks at this moment:
 |
| Ignore the overflowing garbages... I'll take it out tomorrow. |
The empty shelf is where the jars will go, but the stupid wires are bowing in the middle from the weight so I figured it'd be safer to leave them on the counter until I install the wood shelves.
I need to find a big basket in the perfect size to hold the miscellaneous items on the top shelf, which is next on my to-do list:
5. Remove door and wire shelving
6. Patch and paint inside (I hate to be predictable, but I gotta go with turquoise...)
7. Gather/cut wood supplies for shelves
8. Modge Podge fabric onto shelves (instead of heavy items directly on a painted surface)
9. Install shelves
10. Buy new spice jars, restock and organize
11. Hang a fun patterned curtain
12. Enjoy!
In 7 days I'll be flying back home to Cali for the holiday, so I'm not sure how much of Phase 2 I'll be completing this week. I might wait until I return to rip the shelves out and repaint.
Have a wonderful Thanksgiving everyone—I'll be back after the holiday with the next installment!

No comments:
Post a Comment